Piracy: ꜱᴀɪʟ ᴛʜᴇ ʜɪɢʜ ꜱᴇᴀꜱ

54716 readers
217 users here now

⚓ Dedicated to the discussion of digital piracy, including ethical problems and legal advancements.

Rules • Full Version

1. Posts must be related to the discussion of digital piracy

2. Don't request invites, trade, sell, or self-promote

3. Don't request or link to specific pirated titles, including DMs

4. Don't submit low-quality posts, be entitled, or harass others


Loot, Pillage, & Plunder

📜 c/Piracy Wiki (Community Edition):


💰 Please help cover server costs.

Ko-Fi Liberapay
Ko-fi Liberapay

founded 1 year ago
MODERATORS
301
 
 
302


How can I use my VPNs port forwarding feature while also disabling global routing by adding “route-nopull” in the OpenVPN config? Using hide.me vpn

I found a relevant post, but the links to the anwsers don't work anymore: https://forum.netgate.com/topic/127557/openvpn-client-port-forwarding-route-nopull-issue

303


I'd like to play an old classic witch has never made it to modern consoles or steam, I found this site but I don't know if I can trust it

304


This is something I'm running into currently. I was curious what automatic methods there are for IDing files and bulk renaming, organizing, and updating meta data existed.

I have reasonable collection of movies and TV shows to archive.

305


Only recently discovered yt-dlp, despite its popularity. However I was wondering if I were to use this, should it be used behind a VPN when downloading videos off public websites?

https://github.com/yt-dlp/yt-dlp

306


I am looking for a crack of this game for so long

307


I am getting the following error after upgrading yt-dlp

ERROR: [Piracy] This website is no longer supported since it has been determined to be primarily used for piracy. DO NOT open issues for it

Does anyone know any forks that still works.

308
309
310
 
 
311
 
 
312
313


Torrenting this show isn't an option. Every torrent I've tried has this specific episode missing, with a duplicate episode in its place. Most of the streaming sites do, too. The only stream I've found is on vidsrc.me, and I can't for the life of me figure out how to download it.

I've searched around and found multiple recommendations for video downloader sites, and several people suggested the Firefox extension DownThemAll!, but I've had no luck. It's a generic "can't find video" message every time.

I'm guessing these apps and sites worked at some point but they updated their API. Hoping against hope that someone who's done it recently can tell me how they did it.

314


Hello, question about qbit. When i disable the setting bittorrent -> torrent queuing i get over 20 active torrents that are seeding. But i want to limit it it around 12. So i check the box of torrent queuing and configure the following:

  • max active download 5
  • max active uplaod 10
  • max active torrent 12

When i save this i only get 2 active torrent. Does someone know how i can solve this? Thanks for your time!!

315


Hiya, so looking to download videos of certain websites. So far been using https://www.downloadhelper.net/ extension to download the videos manually, but it turns into a very tedious process after a while. Looking for a way to automate this process :) Let me know if there are any tools, programs or solutions to grab stuff off the internet.

316


Are there any sites for PreDBs with filenames and hashes for scene releases?

317


(i’m also gonna ambush my friends about Signal on sunday and coerce them to download it to get rid of the green bubbles)

318
 
 
319


Or any websites like kemono party( which works for patreon)?

320


cross-posted from: https://lemmy.dbzer0.com/post/26316374

I know that this community will fall to the exact same destiny as they all do. 999 posts wanting a Drunkenslug invite and if all the stars align we get a once in a lifetime post of someone offering an invite.

Many of Usenet users don't actually know they can invite people and help others to their first steps into that scene.

So i beg of you, take a look into your profiles, find those invite buttons and offer them here! They will not be of any use if they just get dusty in your profiles, we need those invites in the community!

There is absolutely nothing for you personally to gain here, other than the satisfaction of helping others.

Thank you all and cheers!

321


cross-posted from: https://lazysoci.al/post/16765349

Why doesn't BPC just split the functionality of the extension, so that the filter list is a separate entity?

322
94
submitted 3 months ago* (last edited 3 months ago) by RandomLegend@lemmy.dbzer0.com to c/piracy@lemmy.dbzer0.com


So now that we've setup our arr-stack and are able to download stuff either via usenet or torrents we can actually set up something to consume our media on!

I've used Plex in the past and while it is a much more polished experience than jellyfin, the decisions made by the plex team are not really confidence inspiring when it comes to privacy. So i've switched over to jellyfin and i am more than happy with it!

Jellyseer on the other hand is a much more polished UI for Sonarr and Radarr. It connects to your jellyfin instance to chech what is available and it connects to your sonarr and radarr instance to tell them what you want to download. It's super simple, has an integrated browser for all shows and movies for you to find and looks really frigging good. This is also amazing if you "offer your services" to friends and family, as this is a super easy to understand website for your other users to "request" shows and movies. You can configure if some users requests should automatically be approved or if you want to manually click yes and no for each request.

So let's get going!

0. Preamble

All these guides assume you have basic knowledge about docker & docker compose. To quickly summarize the methods here:

You either use a webui to manage your docker-compose like Dockge or you create a folder and a docker-compose.yaml for each service listed here and copy the contents of each of them into that docker-compose.yaml; IMPORTANT: You HAVE to name them docker-compose.yaml exactly like that. Do NOT name them radarr.yaml for example. After you created a docker-compose.yaml and filled it with the contents here, you simply run docker compose up -d

Since neither Jellyfin nor Jellyseer actually download some "problematic files" there is no need to run them through any VPN. Of course it doesn't hurt to route them through the same VPN you have for sonarr / radarr and the likes.

I will provide two seperate docker-compose.yaml for the Jellyfin installation. One with hardware accelerated transcoding for NVidia cards, and one that has no hw-accel.


1. Folder Structure

This is based entirely on my previous posts on how to set up your arr-stack (usenet or torrents. If you don't use an arr-stack or already have one up and running with a different folder structure you're on your own here.

Since we already established this folder structure we can simply add two more folders for jellyfin and jellyseer in the configs tree:

arr-stack (for this example let's say it's located in /mnt/arr-stack)
	|---- media
	    |---- movies
	    |---- shows
	    |---- music
	    |---- etc.
	|---- configs
	    |---- radarr
	    |---- sonarr
	    |---- qbittorrent
	    |---- jellyfin
            |---- jellyseer
	    |---- etc.
	|---- torrents
	    |---- complete

also, if you have a fast SSD in your system with enough free storage you can also create a folder there for your jellyfin cache. Let's assume it is on /mnt/fastssd/jellyfin/cache This can make a drastic difference in performance and buffering.


2. Docker-Compose Files for each Service

2.1.1 Jellyfin without hardware accelerated transcoding

services:
  jellyfin:
    image: jellyfin/jellyfin
    container_name: jellyfin
    user: 1000:1000
    network_mode: host
    volumes:
      - /mnt/arr-stack:/mnt/arr-stack
      - /mnt/arr-stack/configs/jellyfin:/config
      - /mnt/fastssd/jellyfin/cache:/cache
    restart: unless-stopped

2.1.2 Jellyfin WITH hardware accelerated transcoding (NVidia)

services:
  jellyfin:
    image: jellyfin/jellyfin
    container_name: jellyfin
    user: 1000:1000
    network_mode: host
    volumes:
      - /mnt/arr-stack:/mnt/arr-stack
      - /mnt/arr-stack/configs/jellyfin:/config
      - /mnt/fastssd/jellyfin/cache:/cache
    restart: unless-stopped
    extra_hosts:
      - host.docker.internal:host-gateway
    runtime: nvidia
    deploy:
      resources:
        reservations:
          devices:
            - capabilities:
                - gpu

To test if your server is properly configured to run docker containers with your NVidia GPU you can run the following command:

sudo docker run --rm --runtime=nvidia --gpus all ubuntu nvidia-smi

This will open NVidia-SMI as a docker container. If you see a table there with information about your GPU and the power consumption etc. you're good to go! If not, please look up how to configure your docker host for NVidia GPUs.

2.2 Jellyseer

services:
  jellyseerr:
    image: fallenbagel/jellyseerr:latest
    container_name: jellyseerr
    environment:
      - LOG_LEVEL=debug
      - TZ=Europe/Berlin #Changethis to your timezone!
    ports:
      - 5055:5055
    volumes:
      - /mnt/arr-stack/configs/jellyseerr:/app/config
    restart: unless-stopped

3. Configuring each service

After we've started our services it's time to open the webui's and configure them.

3.1 Jellyfin

  1. Open the webui on http://ipofyourserver:8096
  2. Select Language
  3. Set up username + password
  4. Add a media library
    1. Under content type select the one to start with; Lets assume "Shows"
    2. Give it a "Display Name"
    3. Under Folder click on the + Icon
    4. Browse to /mnt/arr-stack/media/shows and click OK
  5. Add any other Library in the same manner; Movies, Music

3.1.1 Hardware Acceleration

Obviously this part only for if you set jellyfin up with your GPU.

  1. Click the Hamburger Menu in the left upper corner
  2. Go to Settings
  3. Under Administration, click on Dashboard
  4. Click on Playback
  5. Click on Transcoding
  6. Under Hardware Acceleration select "NVidia NVENC"
  7. Select all checkboxes on the different codecs
  8. Enable tone-mapping and keep the algorithm

This is the fundamental basic setup. Jellyfin has an extensive Plugin ecosystem for all different things to do. Most of them make it much more easy to get correct metadata for different types of content.

3.2 Jellyseer

  1. Open the webui http://ipofyourserver:5055
  2. Click on "Use your Jellyfin Account"
  3. Enter your jellyfin URL which is http://ipofyourserver:8096
  4. Enter the credentials you set up in your jellyfin instance
  5. Sign In
  6. Click on "Sync Libraries"
  7. Check your libraries
  8. Click on Start Scan
  9. Click on Continue
  10. Click on Add Radarr Server
  11. Check "Default Server"
  12. Name it "Radarr"
  13. Enter the IP of your Radarr server
  14. Enter your Radarr API Key (you find it in Radarr -> Settings -> General)
  15. Click on Test at the bottom
  16. Select your Quality Profile that you want as a default
  17. Select your Radarr Root Folder
  18. Click on Add Server
  19. Rinse and Repeat with adjusted values for Sonarr

Now if you find a movie or show you can click on "Requst" and see that it will automatically push that request to either radarr or sonarr and they will start looking and downloading for it.


4. You're done

Now you also have a fully functional and possibly hardware accelerated Jellyfin instance that can do movies, shows and music.

One more interesting addition to this stack would be Jellystats

If you're looking for something for adult content that goes hand in hand with Whisparr, look into stash and additionally xbvr if you're looking for a VR library and player.

323


With a whole slew of new reasons on why subscribing to streaming services WILL give you worse services than NOT subscribing to them, i think it's time to write a new up-to-date guide on how to install and configure an Arr-Stack + qBitTorrent via Docker-Compose.

0. Preamble

All these guides assume you have basic knowledge about docker & docker compose. To quickly summarize the methods here:

You either use a webui to manage your docker-compose like Dockge or you create a folder and a docker-compose.yaml for each service listed here and copy the contents of each of them into that docker-compose.yaml; IMPORTANT: You HAVE to name them docker-compose.yaml exactly like that. Do NOT name them radarr.yaml for example. After you created a docker-compose.yaml and filled it with the contents here, you simply run docker compose up -d

I specifically did NOT route all those docker-compose files through a VPN container like Gluetun. In my case i have my Mullvad VPN setup on my router directly and selected the whole server to be tunneled through that VPN.

You can add a VPN container to your setup and route all the docker compose files through that. But i will not go through this on this guide. There are guides out there how to do that and you can even ask any big enough LLM as this isn't really that complicated.

Just as a simple run through. Install Gluetun as an additional docker container and append network_mode: "container:gluetun" at the end of every docker-compose.yaml here according to the gluetun readme. You also have to remove all the ports: sections in the docker-compose.yamls of each service because it will throw an error if you use the network_mode: and you then have to add the ports of each service into the gluetun docker-compose.yaml. You can then start a console for each docker container and check if the outside world IP adress is NOT your real one with curl ipinfo.io

For every configuration step in this guide where it says "ipofyourserver" for sonarr, radarr, etc. you will have to change that to 127.0.0.1 as they all run inside the same network of gluetun.

This is a super super quick run through and you HAVE to properly configure gluetun and run tests that stopping that container does NOT let your real IP go through.


1. Folder Structure

If you want to store all your media on a NAS or some other external drive, make sure it is configured properly for symlinking / hardlinking and that you have proper permissions for this storage. Everything here will run with the 1000 user and has to create new files to work.

So this is the folder structure i use. And it is stored on a NFS-Share coming from my TrueNAS.

arr-stack (for this example let's say it's located in /mnt/arr-stack)
	|---- media
	    |---- movies
	    |---- shows
	    |---- music
	    |---- etc.
	|---- configs
	    |---- radarr
	    |---- sonarr
	    |---- qbittorrent
	    |---- etc.
	|---- torrents
	    |---- complete

I intentionally broke out the torrent folder to make it easier accessible for when you download something fully manual and you want to grab it out of the 'completed' folder without searching too deep.


2. Docker-Compose Files for each service

qBitTorrent is the download application for Usenet. Alternatively you can use NZBget but i find Sab to be more modern, versatile and i just like it.

qBitTorrent

services:
  qbittorrent:
    image: lscr.io/linuxserver/qbittorrent:latest
    container_name: qbittorrent
    environment:
      - PUID=1000
      - PGID=1000
      - TZ=Etc/UTC
      - WEBUI_PORT=8081
    volumes:
      - /mnt/arr-stack/configs/qbittorrent/config:/config
      - /mnt/arr-stack/torrents/complete:/mnt/arr-stack/torrents/complete
    ports:
      - 8081:8081
      - 6881:6881
      - 6881:6881/udp
    restart: unless-stopped
networks: {}

Radarr and Sonarr are the applications that will actually find and track your Movies (Radarr) and Shows (Sonarr). Additionally there is Lidarr for Music and Whisparr for porn.

Radarr

services:
  arch-radarr:
    ports:
      - 7878:7878
    container_name: radarr
    volumes:
      - /mnt/arr-stack:/mnt/arr-stack
      - /mnt/arr-stack/configs/radarr:/config
      - /etc/localtime:/etc/localtime:ro
    environment:
      - PUID=1000
      - PGID=1000
    image: binhex/arch-radarr
    restart: unless-stopped
networks: {}

Sonarr

services:
  arch-sonarr:
    ports:
      - 8989:8989
      - 9897:9897
    container_name: sonarr
    volumes:
      - /mnt/arr-stack:/mnt/arr-stack
      - /mnt/arr-stack/configs/sonarr:/config
      - /etc/localtime:/etc/localtime:ro
    environment:
      - PUID=1000
      - PGID=1000
    image: binhex/arch-sonarr
    restart: unless-stopped
networks: {}

Prowlarr is the application where you can configure your usenet sites. There you will put in the URLs of your Indexers like Drunkenslug and your API keys for those sites. Prowlarr will periodically check the availability of those services and will sync these accounts to all your connected services (Radarr, Sonarr, Lidarr, Whisparr, etc.). Prowlarr will then be doing the actual heavy lifting of accessing the API of any Usenet and search for your stuff.

Prowlarr

services:
  arch-prowlarr:
    ports:
      - 9696:9696
    container_name: prowlarr
    volumes:
      - /mnt/arr-stack/configs/prowlarr:/config
      - /etc/localtime:/etc/localtime:ro
    environment:
      - PUID=1000
      - PGID=1000
    image: binhex/arch-prowlarr
    restart: unless-stopped
networks: {}

3. Configuring each service

Now that we have all these Services up and running. It's time to properly configure them. Let's start with qBitTorrent

3.1 qBitTorrent

  1. Open the Webui with http://ipofyourserver:8081
  2. Click on "Tools" in the menu bar
  3. Click on Options
  4. Click on Web Ui
  5. Under "Authentification" change your Username and Password
  6. Click on Save at the bottom

3.2 Sonarr

  1. Open the Webui with http://ipofyourserver:8989
  2. Click on Settings

Root Folder

  1. Click on "Media Management"
  2. Under Root Folders, add /mnt/arr-stack/media/shows

Connect qBitTorrent

  1. Click on "Download Clients"
  2. Click on the big PLUS icon
  3. Select qBitTorrent
  4. Enter the IP Adress of your server
  5. Port: 8081
  6. Enter your username and passwort from earlier
  7. Under Category enter tv
  8. Check "Remove Completed"
  9. Click on Test and Save

Grab your API Token

  1. Click on General
  2. Copy API Key and save it for later. We need it for Prowlarr

3.3 Radarr

  1. Open the Webui with http://ipofyourserver:7878
  2. Click on Settings

Root Folder

  1. Click on "Media Management"
  2. Under Root Folders, add /mnt/arr-stack/media/movies

Connect qBitTorrent

  1. Click on "Download Clients"
  2. Click on the big PLUS icon
  3. Select qBitTorrent
  4. Enter the IP Adress of your server
  5. Port: 8081
  6. Enter your username and passwort from earlier
  7. Under Category enter tv
  8. Check "Remove Completed"
  9. Click on Test and Save

Grab your API Token

  1. Click on General
  2. Copy API Key and save it for later. We need it for Prowlarr

The same procedure goes for Lidarr and Whisparr aswell with their respective categories changed.


3.4 Prowlarr

  1. Open the Webui with http://ipofyourserver:9696
  2. Click on Settings

Connect Sonarr and Radarr

  1. Click on Apps
  2. Click on the big Plus Icon
  3. Click on Sonarr
  4. Sync Level "Full Sync"
  5. Tags: none
  6. Prowlarr Server: http://localhost:9696
  7. Sonarr Server: http://ipofyourserver:8989
  8. API Key from Sonarr
  9. Test and Save
  10. Rinse and Repeat for Radarr with adjusted infos

Add Indexers

  1. Click on Indexers
  2. Click on Add Indexer
  3. Type in the name of your indexer. Many of the big ones will be pre configures
  4. Example: The Pirate Bay
  5. Click on the entry
  6. Check "Enable"
  7. Sync Profile "Standard"
  8. Under Base URL select the first one (you may have to cycle through if one of them doesn't work)
  9. Enter your Seed Ratio
  10. Test and Save

Prowlarr will now test and sync the indexers to your other apps like Sonarr and Radarr. Manually click on Test all Inders and then on Sync all Indexers. Now go back to Sonarr and Radarr and click on Settings -> Indexers and check if Drunkenslug (in our example) shows up there.


4. You're done

Now this is obviously just the tip of the iceberg. You still don't have "finetuned" profiles and explaining these would absolutely blow up the scope of this post.

I highly recommend you to check out these two posts over on the trash-guides site: Sonarr Profiles and Radarr Profiles

So, these are the basics and there is much more to finetune. But you absolutely are ready to go sailing on the high seas now!

If you're looking for a neat mobile app to manage your sonarr, radarr and sabnzbd i highly recommend you check out nzb360.

Here is an alternate guide on how to set it up for Usenet Downloads: https://lemmy.dbzer0.com/post/26287096

Part 2 of this Guide is aiming for Jellyfin + Jellyseer: https://lemmy.dbzer0.com/post/26296377

  • /mnt/arr-stack/torrents/complete:/mnt/arr-stack/torrents/complete
324


With a whole slew of new reasons on why subscribing to streaming services WILL give you worse services than NOT subscribing to them, i think it's time to write a new up-to-date guide on how to install and configure an Arr-Stack + SABnzbd via Docker-Compose.

0. Preamble

All these guides assume you have basic knowledge about docker & docker compose. To quickly summarize the methods here:

You either use a webui to manage your docker-compose like Dockge or you create a folder and a docker-compose.yaml for each service listed here and copy the contents of each of them into that docker-compose.yaml; IMPORTANT: You HAVE to name them docker-compose.yaml exactly like that. Do NOT name them radarr.yaml for example. After you created a docker-compose.yaml and filled it with the contents here, you simply run docker compose up -d

I specifically did NOT route all those docker-compose files through a VPN container like Gluetun. In my case i have my Mullvad VPN setup on my router directly and selected the whole server to be tunneled through that VPN.

You can add a VPN container to your setup and route all the docker compose files through that. But i will not go through this on this guide. There are guides out there how to do that and you can even ask any big enough LLM as this isn't really that complicated.

Just as a simple run through. Install Gluetun as an additional docker container and append network_mode: "container:gluetun" at the end of every docker-compose.yaml here according to the gluetun readme. You also have to remove all the ports: sections in the docker-compose.yamls of each service because it will throw an error if you use the network_mode: and you then have to add the ports of each service into the gluetun docker-compose.yaml. You can then start a console for each docker container and check if the outside world IP adress is NOT your real one with curl ipinfo.io

For every configuration step in this guide where it says "ipofyourserver" for sonarr, radarr, etc. you will have to change that to 127.0.0.1 as they all run inside the same network of gluetun.

This is a super super quick run through and you HAVE to properly configure gluetun and run tests that stopping that container does NOT let your real IP go through.


1. Folder Structure

If you want to store all your media on a NAS or some other external drive, make sure it is configured properly for symlinking / hardlinking and that you have proper permissions for this storage. Everything here will run with the 1000 user and has to create new files to work.

So this is the folder structure i use. And it is stored on a NFS-Share coming from my TrueNAS.

arr-stack (for this example let's say it's located in /mnt/arr-stack)
	|---- media
	    |---- movies
	    |---- shows
	    |---- music
	    |---- etc.
	|---- configs
	    |---- radarr
	    |---- sonarr
	    |---- SABnzbd
	    |---- etc.
	|---- nzb
	    |---- watchfolder
		    |---- movies
		    |---- shows
		    |---- music
		    |---- etc.
	    |---- complete
	    |---- incomplete

I intentionally broke out the nzb folder to make it easier accessible for the watchfolder and/or if you download something fully manual and you want to grab it out of the 'completed' folder without searching too deep.


2. Docker-Compose Files for each service

SABnzbd is the download application for Usenet. Alternatively you can use NZBget but i find Sab to be more modern, versatile and i just like it.

SABnzbd

services:
  arch-SABnzbd:
    ports:
      - 8080:8080
      - 8090:8090
    container_name: SABnzbd
    volumes:
      - /mnt/arr-stack:/arr-stack
      - /mnt/arr-stack/configs/SABnzbd:/config
      - /etc/localtime:/etc/localtime:ro
    environment:
      - PUID=1000
      - PGID=1000
    image: binhex/arch-SABnzbd
    restart: unless-stopped
networks: {}

Radarr and Sonarr are the applications that will actually find and track your Movies (Radarr) and Shows (Sonarr). Additionally there is Lidarr for Music and Whisparr for porn.

Radarr

services:
  arch-radarr:
    ports:
      - 7878:7878
    container_name: radarr
    volumes:
      - /mnt/arr-stack:/mnt/arr-stack
      - /mnt/arr-stack/configs/radarr:/config
      - /etc/localtime:/etc/localtime:ro
    environment:
      - PUID=1000
      - PGID=1000
    image: binhex/arch-radarr
    restart: unless-stopped
networks: {}

Sonarr

services:
  arch-sonarr:
    ports:
      - 8989:8989
      - 9897:9897
    container_name: sonarr
    volumes:
      - /mnt/arr-stack:/mnt/arr-stack
      - /mnt/arr-stack/configs/sonarr:/config
      - /etc/localtime:/etc/localtime:ro
    environment:
      - PUID=1000
      - PGID=1000
    image: binhex/arch-sonarr
    restart: unless-stopped
networks: {}

Prowlarr is the application where you can configure your usenet sites. There you will put in the URLs of your Indexers like Drunkenslug and your API keys for those sites. Prowlarr will periodically check the availability of those services and will sync these accounts to all your connected services (Radarr, Sonarr, Lidarr, Whisparr, etc.). Prowlarr will then be doing the actual heavy lifting of accessing the API of any Usenet and search for your stuff.

Prowlarr

services:
  arch-prowlarr:
    ports:
      - 9696:9696
    container_name: prowlarr
    volumes:
      - /mnt/arr-stack/configs/prowlarr:/config
      - /etc/localtime:/etc/localtime:ro
    environment:
      - PUID=1000
      - PGID=1000
    image: binhex/arch-prowlarr
    restart: unless-stopped
networks: {}

3. Configuring each service

Now that we have all these Services up and running. It's time to properly configure them. Let's start with SABnzbd

3.1 SABnzbd

  1. Open the Webui with http://ipofyourserver:8080
  2. Click on the settings icon (cog) in the upper right corner

Configure Usenet providers (Servers)

  1. Go to "Servers"
  2. Enter your Usenet providers here. These are NOT the indexers like Drunkenslug. These are the server that actually host all the files; fastusenet.org, usenight.com, frugalusenet, etc. etc. You will find the specific addresses and ports to enter on your member-are on those sites.
  3. Click on "Test Server" and make sure everything is running fine.

Configure Folders

  1. Go to "Folders"
  2. Temporary Download Folder: If you have a fast SSD with enough storage you can use this. For this you would have to mount a new volume in your SABnzbd docker compose; e.G. /mnt/fastssd/temp and then configure it here. "Engough Storage" depends on your internet speed as this directory fills up while you download stuff. This is then getting moved over to the final location. So if you're on Gigabit internet, i just made sure to always have 100GB free on my temporary drive.
  3. Completed Download Folder: /mnt/arr-stack/nzb/complete
  4. Watched Folder: /mnt/arr-stack/nzb/watchfolder This is where you can then create new directories with the categories names (comes in next step). You can then place nzb files you manually loaded from a forum or something into these "watchfolders". Sab will then start to download these with that specific category set. This is useful for when Sonarr for example didn't find a release you like and you got something out of a forum. Downloading it with the category via Watchfolder will enable sonarr to actually see those manual downloads and allows you to import them easier.

Configure Categories

  1. Go to "Categories"
  2. Find the row where it says "+Add" at the end.
  3. In that row you create a tv category and click +Add
  4. And one movies category and click +Add
  5. You can change the priorities of each category as you like
  6. Keep the "Folder/Path" filed empty

Grab your API Token

  1. Go to General
  2. Copy the API Key We will need this key to be put in Sonarr, Radarr, etc.

3.2 Sonarr

  1. Open the Webui with http://ipofyourserver:8989
  2. Click on Settings

Root Folder

  1. Click on "Media Management"
  2. Under Root Folders, add /mnt/arr-stack/media/shows

Connect SABnzbd

  1. Click on "Download Clients"
  2. Click on the big PLUS icon
  3. Select SABnzbd
  4. Enter the IP Adress of your server
  5. Port: 8090
  6. Check "Use SSL"
  7. Enter the API Key you copied earlier
  8. Under Category enter tv
  9. Check "Remove Completed" and "Remove failed"
  10. Click on Test and Save

Grab your API Token

  1. Click on General
  2. Copy API Key and save it for later. We need it for Prowlarr

3.3 Radarr

  1. Open the Webui with http://ipofyourserver:7878
  2. Click on Settings

Root Folder

  1. Click on "Media Management"
  2. Under Root Folders, add /mnt/arr-stack/media/movies

Connect SABnzbd

  1. Click on "Download Clients"
  2. Click on the big PLUS icon
  3. Select SABnzbd
  4. Enter the IP Adress of your server
  5. Port: 8090
  6. Check "Use SSL"
  7. Enter the API Key you copied earlier
  8. Under Category enter movies
  9. Check "Remove Completed" and "Remove failed"
  10. Click on Test and Save

Grab your API Token

  1. Click on General
  2. Copy API Key and save it for later. We need it for Prowlarr

The same procedure goes for Lidarr and Whisparr aswell with their respective categories changed.


3.4 Prowlarr

  1. Open the Webui with http://ipofyourserver:9696
  2. Click on Settings

Connect Sonarr and Radarr

  1. Click on Apps
  2. Click on the big Plus Icon
  3. Click on Sonarr
  4. Sync Level "Full Sync"
  5. Tags: none
  6. Prowlarr Server: http://localhost:9696
  7. Sonarr Server: http://ipofyourserver:8989
  8. API Key from Sonarr
  9. Test and Save
  10. Rinse and Repeat for Radarr with adjusted infos

Add Indexers

  1. Click on Indexers
  2. Click on Add Indexer
  3. Type in the name of your indexer. Many of the big ones will be pre configures
  4. Example: Drunkenslug
  5. Click on the entry
  6. Check "Enable"
  7. Sync Profile "Standard"
  8. Enter your API Key from Drunkenslug
  9. Enter when your VIP Subscription will expire
  10. Test and Save

Prowlarr will now test and sync the indexers to your other apps like Sonarr and Radarr. Manually click on Test all Inders and then on Sync all Indexers. Now go back to Sonarr and Radarr and click on Settings -> Indexers and check if Drunkenslug (in our example) shows up there.


4. You're done

Now this is obviously just the tip of the iceberg. You still don't have "finetuned" profiles and explaining these would absolutely blow up the scope of this post.

I highly recommend you to check out these two posts over on the trash-guides site: Sonarr Profiles and Radarr Profiles

Also if you still don't have a working indexer and just read this guide out of interest you have to actively search for them. Usenet servers like the ones i listed earlier are always open to register. Indexers however are not. Most of them are private and closed and only let you in on a few days per year or if you get an invite from another user.

There are some communities that revolve around sharing invites. You will find them with looking for "usenet invites"

So, these are the basics and there is much more to finetune. But as soon as you have an invite and registered for a host you absolutely are ready to go sailing on the high seas!

If you're looking for a neat mobile app to manage your sonarr, radarr and sabnzbd i highly recommend you check out nzb360.

Here is an alternate guide on how to set it up using qBitTorrent for torrents: https://lemmy.dbzer0.com/post/26293605

Part 2 of this Guide is aiming for Jellyfin + Jellyseer: https://lemmy.dbzer0.com/post/26296377

325


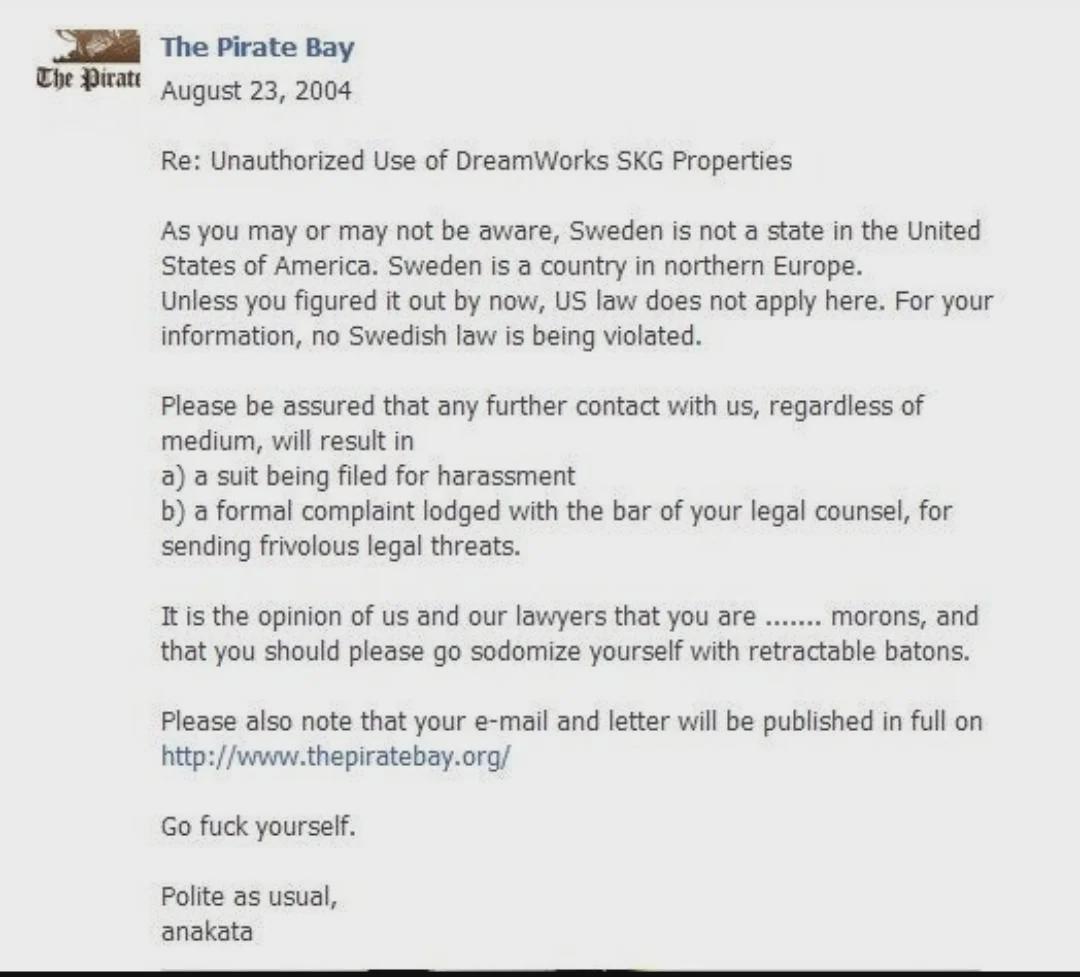
One of the earliest cases of the fight against copyright and intellectual property dates back to the sixth century AD. The pirate turned out to be a Columba saint, a famous Irish monk and preacher. According to legend, for several nights he quietly copied a book that belonged to another saint, Finian. Back then, all books were copied by hand, so it was quite a laborious task. But the book was also very rare and valuable. Historians speculate that it may have been one of the rare translations of the Psalter.

view more: ‹ prev next ›